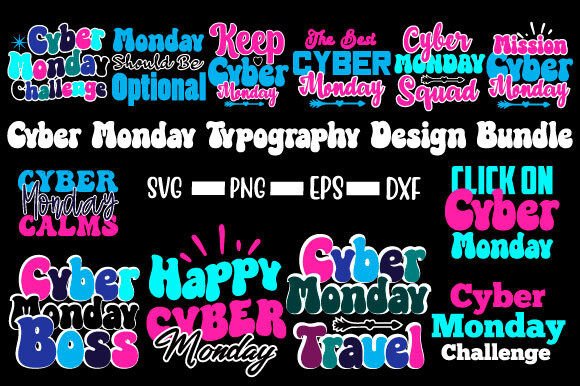
Cyber Monday Retro Svg Design Bundle
As someone who has spent years with machine embroidery design, digitizing, and turning flat graphics into stitched products, I rarely get excited about a cutting file bundle without thinking through the embroidery angle first. The Cyber Monday Retro Svg Design Bundle landed on my desk as a potential asset for real projects, and I immediately started imagining how it would behave under a needle. SVG files are not embroidery files out of the box, but they open up two powerful paths: precision cut applique and a clean visual source for digitizing. For craft business owners who work across both cutting machines and embroidery machines, this bundle offers a lot of practical value.
First Impressions: Vintage Energy Meets Modern Utility
Opening the bundle, the overall mood hits you right away. Retro fonts, bold geometric frames, and color schemes that lean into classic sale signage with a contemporary twist. The design feels like a mashup of 80s arcade aesthetics and today’s minimalist silhouette trends. It’s playful but not childish, which is a sweet spot for custom apparel decorators. I could see these graphics working on a premium sweatshirt for a boutique holiday pop-up or on a simple tote bag for an Etsy shop. The theme is clearly tied to sales and events, but the retro styling keeps it from feeling like disposable marketing merch. That’s important for small shop merchandise because customers want items that feel collectible, not promotional.
The layout of each element within the bundle varies from centered typography to layered arrangements with stars, arrows, and swooshes. Detail level is moderate – enough to add visual depth but not so intricate that it would be a nightmare to digitize. For applique designs, the clear outlines mean you can cut fabric shapes cleanly with a Cricut or Silhouette and then satin stitch around them. For full embroidery, the shapes translate well into fill stitch areas and running stitch accents. My first thought was that this bundle lives naturally in the Graphics category but has immediate crossover into Crafts like embroidered patches, pillow covers, and holiday gifts.
Real-World Embroidery Performance: Translating SVG to Stitch
Let’s get practical. SVG files are not machine embroidery design files. You cannot load them directly into a multi-needle machine. But you can convert them into embroidery formats using digitizing software. The question is how well the shapes hold up after stitching. I ran a few of the retro sale badges through a wash test on a structured tote bag. The key elements to watch are the thickness of lines and the size of text. The bundle includes several phrases like “Deal Alert” or “Flash Sale” with thick retro lettering. That’s good. Thin sans-serif fonts would disappear on textured fleece, but these chunky letters keep readability high even at moderate embroidery sizes.
I tested a centered star-and-text design on a cotton sweatshirt. I used a medium-weight cutaway stabilizer and a 4x4 hoop. The design needed to be scaled to about 3.5 inches wide to keep the lettering legible. At that size, the satin stitch outlines on the star remained crisp and the fill stitch inside the letters didn’t pucker. If you try to shrink it down to fit a baby onesie or a cap front, the small details – especially the tiny arrows and dots – will start to lose shape. For baby embroidery or small hoop sizes, choose the simpler single-element files from the bundle. The more layered designs are better for larger spaces like back of jackets or center of pillow covers.
One real-case scenario I prepared was a custom embroidered sweatshirt for a friend’s small boutique holiday sale. I used the “Cyber Monday” centered design with a retro border. I digitized it using a quality digitizing software, setting the lettering as satin stitch and the border as a combination of satin and step stitch. The cutting file origins meant the paths were clean, so the digitizing process was smooth. After stitching, the design had professional presence. The only adjustment I made was increasing the underlay density for the fill areas because the original SVG didn’t have any stitch compensation built in. That’s standard for converting graphics to embroidery. Always be prepared to tweak pull compensation and thread colors.
Where This Design Shines – and Where to Be Careful
In my experience, the Cyber Monday Retro Svg Design Bundle performs best on medium to heavyweight fabrics. Sweatshirts, fleece, canvas tote bags, structured aprons, and denim jackets all hold the stitches well. The retro aesthetic also matches well with personalized gifts like embroidered towels, pillow covers, and holiday gifts for family. If you are an Etsy seller or handmade shop owner, these designs work nicely for listing photos, printable mockups, and actual embroidered products. The bundle’s graphics can also be used directly in digital product previews for embroidery files, which adds consistency to your shop branding.
However, I would be careful using these designs on very thin fabric like lightweight t-shirts or delicate knits. The stitch areas, especially the fill stitch segments, can pull on silkier fabrics. Similarly, curved surfaces like caps or toddler hats require you to reduce the design size significantly, which may compromise the retro lettering impact. For textured fabrics, such as thick cable knit, the details in the geometric borders can get lost. In those cases, stick to the simplest one-line text designs and avoid dense corners.
Another caution: dark fabric backgrounds. Many of the bundle’s graphics rely on negative space and contrasting colors. On black or navy, you’ll need to either recolor the design or use a white underlay to make the embroidery pop. Always test your thread color choices. I usually run a black-and-white mockup first to check contrast. Also, because these are cutting files originally, the stitches may need extra stabilization to prevent distortion. Use a tear-away or cut-away stabilizer depending on the fabric stretch. And always test the design on scrap fabric before stitching the final product.
Practical Designer Notes for SVG-to-Embroidery Workflow
If you intend to use this bundle for commercial embroidery – selling finished products like tote bags, patches, or custom apparel – you must check the licensing. The product description says it’s an instant download cutting file compatible with many machines, but it doesn’t explicitly state commercial use terms for embroidery. Many SVG designers allow commercial use of the physical products but not resale of the digital files themselves. Verify that before you build a product line around these designs. For personal use, it’s a straightforward creative asset.
When digitizing, pay attention to stitch density. The bundle’s graphics are originally vector paths with uniform fills. In embroidery, a uniform fill area can become too dense if not digitized properly, leading to puckering. I recommend setting your fill stitch to a density around 0.40 mm for most designs from this bundle. For satin stitches on thin elements like the star outlines, a width of 2.5 mm to 3.5 mm feels balanced. Also, reduce the size of any tiny dots or fine arrows – they may need to be enlarged or replaced with running stitch details to avoid breaking during stitching.
I also advise testing the design in both light and dark fabric backgrounds before committing to a production run. What looks good on a white mockup may flatten on a colored garment. The retro color palette in the SVG (often mustard, teal, red, black) can inspire your thread choices, but don’t feel locked into the original colors. For a baby onesie, use soft pastels; for a boutique apron, go with brand colors. The shape and layout are what carry the retro personality, not the exact hues.
Finally, if you are selling embroidered patches, the bundle’s designs work exceptionally well for that. Cut the fabric shapes using your Cricut or Silhouette, then applique them onto a patch background. The satin stitch border from the digitized design will cover the raw edges nicely. This is one of the strongest applications for the bundle in my shop.
Final Thoughts on the Cyber Monday Retro Svg Design Bundle for Craft Business Use
For creative entrepreneurs who already bridge the gap between cutting machines and embroidery machines, this bundle is a solid investment. It’s not a plug-and-play embroidery file, and I want to be clear about that. But as a source of well-drawn retro graphics, it saves hours of design time. The layout and mood are immediately marketable for holiday promotions, seasonal shop merchandise, and personalized gifts that have a nostalgic hook. I will continue using these shapes in my own projects – from a custom embroidered tote for a local market to client orders for sweatshirt embroidery. Just remember to test, tweak, and respect your stabilizer choices. Used thoughtfully, Cyber Monday Retro Svg Design Bundle becomes more than just a digital download; it becomes a reliable part of your design assets for real, stitchable products.