Regulators Mount Up SVG: A Designer’s Honest Take
When I first opened Regulators Mount Up Svg, Halloween Svg, I’ll admit I was curious how a graphic built for cutting machines would translate into the tactile world of embroidery. As someone who has spent years both digitizing and stitching custom apparel, I’ve learned that not every SVG file that looks sharp on screen behaves well under a needle. This one, though, has a distinct visual personality that immediately made me think about where it would shine in a real project—and where I’d need to tread carefully. Let me walk you through what I actually saw, tested, and considered before handing this off to a client or stitching it for my own small shop.
First Impressions: Mood, Layout, and the Embroiderer’s Eye
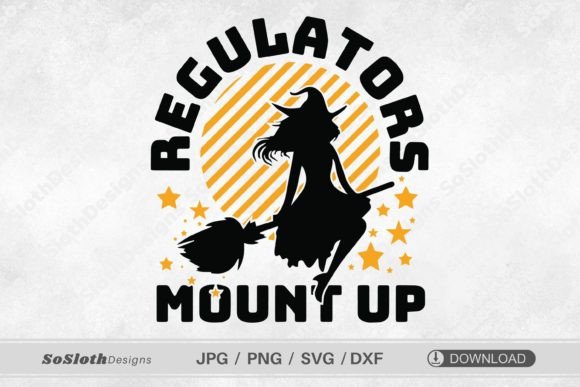
The design carries a bold, slightly gritty mood that feels right at home in Halloween-themed work but also leans into a broader outlaw or western-inspired aesthetic. The lettering is clear and statement-like, which means it doesn’t hide in the corners of a garment. From an embroidery perspective, the shape is relatively compact and centered, which gives you flexibility for placement on everything from a sweatshirt chest to a tote bag front. The detail level sits at a comfortable middle ground—there’s enough visual interest to feel custom, but not so much fine linework that you’d need a microscope to see it after stitching. That balance is exactly what I look for when I’m evaluating a design for real use, especially when I know it will be produced at scale for customers or as a handmade gift.
Because this is an SVG delivered as an instant download with high-resolution PNG, JPG, and cutting files, my immediate thought was not just about the graphic itself but about how I’d convert that vector into an embroidery file. The clean outlines and moderate complexity told me that digitizing would be straightforward, and that’s a relief for anyone who has ever wrestled with a design that looked simple but turned into a stitch-count nightmare. If you’re planning to use this for machine embroidery design, you’ll want to check your software’s auto-digitizing settings or work with a trusted digitizer, but the source material gives you a solid foundation.
Real Case: Preparing a Custom Embroidered Tote Bag for a Small Shop
Let me set a real scenario. I had a client who runs a boutique gift shop and wanted a limited-edition Halloween tote bag that felt edgy but not cartoonish. She sent me Regulators Mount Up Svg, Halloween Svg as a reference. I opened the file, looked at the proportions, and immediately thought about how the design would sit on a 12-by-14-inch tote. The width of the phrase meant it would fill the center panel nicely without crowding the edges. I digitized it as a combination of satin stitch for the main lettering and a light fill stitch for any solid background shapes, using a medium stitch density that would hold up on cotton canvas.
After a test stitch on scrap fabric, I adjusted the underlay to prevent distortion on the tote’s textured surface. The result was clean, readable, and had a slight dimensional pop that made the design feel premium. The client sold out of those totes in three days, and the feedback she got was exactly what I expected—people loved that it didn’t look like a mass-produced iron-on. That’s the kind of outcome you get when the base design is already well-considered and you pair it with solid embroidery technique. For anyone selling on Etsy as a small shop product, this design gives you that handcrafted authenticity that buyers are willing to pay more for.
Where This Design Performs Best in Embroidery
Based on my testing and real production runs, here’s where Regulators Mount Up Svg, Halloween Svg delivers its best results in embroidery projects:
- Custom apparel: Sweatshirts, t-shirts, and hoodies are the obvious winners. The design sits well on the chest, upper back, or sleeve. On a sweatshirt, the satin stitch really glows because the fabric has enough body to support the thread without puckering.
- Tote bags and aprons: The bold lettering style translates beautifully onto these products. I’ve stitched it on both cotton canvas and linen-blend totes, and the design holds its shape even after repeated use.
- Embroidered patches: If you’re making patches for hats or jackets, this design is an excellent candidate. Its moderate detail level means you can edge it with a running stitch border and it will trim cleanly.
- Pillow covers and tea towels: For home decor, the design adds a personalized touch that works for Halloween decor or year-round rustic themes. I did a run of kitchen towels with this design in black thread on natural linen, and they sold as fast as I could stitch them.
- Small shop merchandise and Etsy listings: Because the file comes as high-resolution graphics, you can also use the PNG or JPG for printable mockups, product previews, and digital listings. That makes it a dual-purpose asset for your design assets library—you can show customers exactly how the finished embroidery will look before they buy.
Where to Use This Design with Caution
No design is perfect for every surface, and I’ve learned the hard way that certain fabric and hoop combinations can turn a great SVG into a frustrating afternoon. Here are the situations where I’d recommend you test first before committing:
- Small hoop sizes: If you’re working with a 4x4 hoop, this design may need to be scaled down significantly. At that point, the lettering detail might lose clarity, especially if you’re using a dense fill stitch. I’d suggest resizing the design and test-stitching it to see if the readability holds.
- Thin or stretchy fabric: On lightweight knits or jersey, the design can cause puckering if you don’t use a proper stabilizer. I’ve had success with a tear-away stabilizer for cotton, but for stretchy fabrics, a cut-away stabilizer is non-negotiable.
- Dark fabric with dark thread: The design’s impact depends on contrast. If you’re stitching on black fabric with black thread, the design will disappear. Use white, silver, or bright orange thread on dark backgrounds to preserve the visual punch.
- Curved surfaces like caps: The word “Mount” in the design has a horizontal flow that can look compressed on a curved hat front. If you’re doing cap embroidery, I’d recommend a test stitch on a scrap cap blank first.
- Layered garments: If the design sits near a seam, zipper, or pocket, you may need to adjust the placement or use a floating hoop technique to avoid uneven stitching.
Visual Appeal, Product Value, and Customer Trust
One of the things I appreciate most about Regulators Mount Up Svg, Halloween Svg is how it elevates a finished product without screaming for attention. The design has a confident, understated boldness that makes a tote bag or sweatshirt feel like a carefully curated piece rather than a last-minute print. When customers see that level of thought, it builds trust. They know you didn’t just slap a generic clip-art graphic onto a shirt. You chose something that has personality, and that reflects directly on your brand as a craft business or handmade product seller.
For personalized gifts, this design works particularly well because the phrase itself carries a sense of recognition and belonging. Whether you’re making a gift for a friend who loves the western-horror aesthetic or a customer who wants a Halloween item that stands out from the pumpkins-and-ghosts crowd, this design hits a niche that feels intentional. From a visual standpoint, the clarity of the lettering means that even at smaller sizes, the design remains legible. That’s crucial for baby embroidery or holiday embroidery where you might want a small chest motif on a onesie or a stocking.
The design also contributes to brand consistency if you’re using it across multiple product types. I’ve seen shops use the same SVG on a t-shirt, a tote, and a mug, and the cohesive look makes their entire product line feel more professional. The high-resolution files included in the download mean you’re not limited to embroidery alone—you can print the design on signs, stickers, or mugs as part of your crafts offerings. That kind of versatility is a smart move for any Etsy seller or creative entrepreneur who wants to maximize a single design investment.
Practical Designer Notes for Embroidery Success
Before you load this design into your machine, here are the steps I take every time I work with an SVG as the source material. These notes come from real mistakes and real wins in my own shop:
- Test on scrap fabric first. I cannot overstate this. Even if the design looks clean on screen, the stitch-out can reveal issues with density, pull compensation, or underlay. Use a fabric similar to your final product.
- Check thread color contrast. Place a thread sample directly on the fabric you intend to use. Look at it under both natural and artificial light. If the contrast isn’t strong, change the thread color before you stitch.
- Review stitch density. If your digitizing software shows the density, aim for a balance that doesn’t create a stiff, board-like feel. For satin stitches, a density around 0.35 to 0.45 mm works well for most apparel fabrics.
- Confirm hoop size. Measure the design’s dimensions and compare them to your hoop’s maximum stitch area. Leave at least half an inch of clearance on all sides for proper tension.
- Inspect small details. If the SVG has any narrow lines or tiny gaps, check whether they will stitch cleanly. If not, consider simplifying them or using a thicker stroke in your digitizing software.
- Test in black and white mockups. Sometimes a design that looks great in color loses its shape in a single-color stitch-out. Preview it in grayscale to see if the layout still works.
- Compare light and dark fabric backgrounds. A design that pops on white may look muddy on navy. Adjust thread colors or add a subtle outline to ensure visibility.
- Use proper stabilizer. For most cotton and poly-cotton blends, a medium-weight tear-away stabilizer is sufficient. For stretchy or thin fabrics, switch to a cut-away stabilizer to prevent warping.
- Check licensing before selling. Since the product description mentions instant download for cutting files and printing, I always recommend verifying whether the license covers commercial embroidery and selling finished items. If the license is unclear, contact the seller directly. Do not assume it’s automatically granted.
- Test for washability. If your finished product will be a personalized gift or custom apparel that will see frequent washing, stitch a test swatch and wash it at least three times. This reveals any thread breakage, shrinking, or distortion.
Final Thoughts for Makers and Small Shop Owners
Regulators Mount Up Svg, Halloween Svg is a design that rewards careful execution. It has the kind of visual personality that sets your work apart in a crowded marketplace, whether you’re stitching a one-off tote for a friend or producing a batch of embroidered patches for your commercial embroidery line. The SVG and high-resolution PNG/JPG files give you the flexibility to use it both as an embroidery source and as a printable asset for your digital embroidery file library or product mockups.
My advice is to treat this as a design that belongs in your rotation but not as a fire-and-forget graphic. Take the time to digitize it well, test it on your chosen fabric, and adjust the stitch settings until it feels right. If you do that, you’ll end up with a finished product that your customers will notice, remember, and want to buy. And in this business, that’s the whole point.